How to Use Milk Jugs to Sow Seeds in the Winter
You know all those seeds that have written on their packet to be “directly sown in early spring as soon as soil can be worked”…well, those have always been pretty tricky ones for me here in my garden to swing.
In Maine, early spring still means snow, and usually still a good amount. Then there’s the whole waiting for the soil to be able to be worked, well some years that’s not until mid-May. And if I wait until then, many of these kind of seeds (which are primarily flowers), will not fair well as they don’t want to go from newly sown to summer temps as many of these seeds require a period of exposure to cold in order to successfully germinate.
Because of the weather wackiness, I used to try to start many of these seeds indoors. And they did okay, not phenomenal, but okay. I remember the first year I grew Clarkia, which I had been so excited about, but by the time it bloomed in my garden, it was rather a let down. So much so, I didn’t think I’d bother growing it again. Same with my annual poppies. They were more ploppy, than poppy. It wasn’t until I sowed the same seeds via the milk jug winter sowing methods that I saw how gorgeous and prolific these flowers truly can be.
Aside from resulting in healthier, more strapping plants, the milk jug method also saves you valuable growing room inside you house (use it to plant more herbs!). It also saves you the electricity costs of needing lighting (and I really, really need to save here). It lets Nature take the wheel on the whole hardening off process, as well as there’s no transplant shock because the plants are acclimated to your weather and growing conditions. And most of all…it frees you up from having to maintain anything (let us all take in a collective sigh of relief for this one in particular)!
Milk Jug Winter Sowing How-To
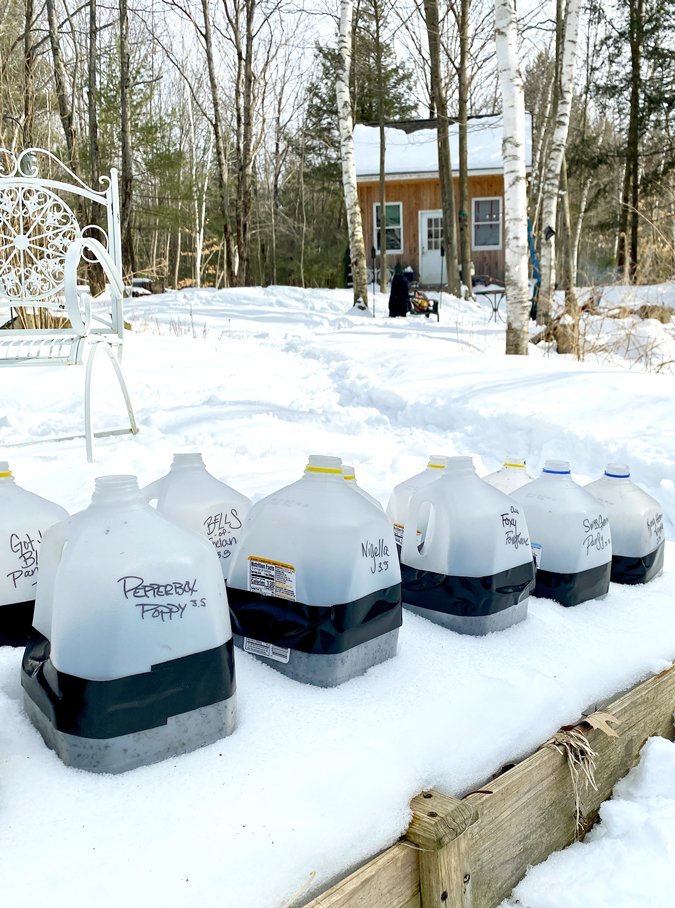
• Start by collecting some milk jugs and give them a good cleaning. You do not need to cap to the jug. In fact, it’s important to keep that open to allow for moisture to come into the jug, and excess heat to escape.
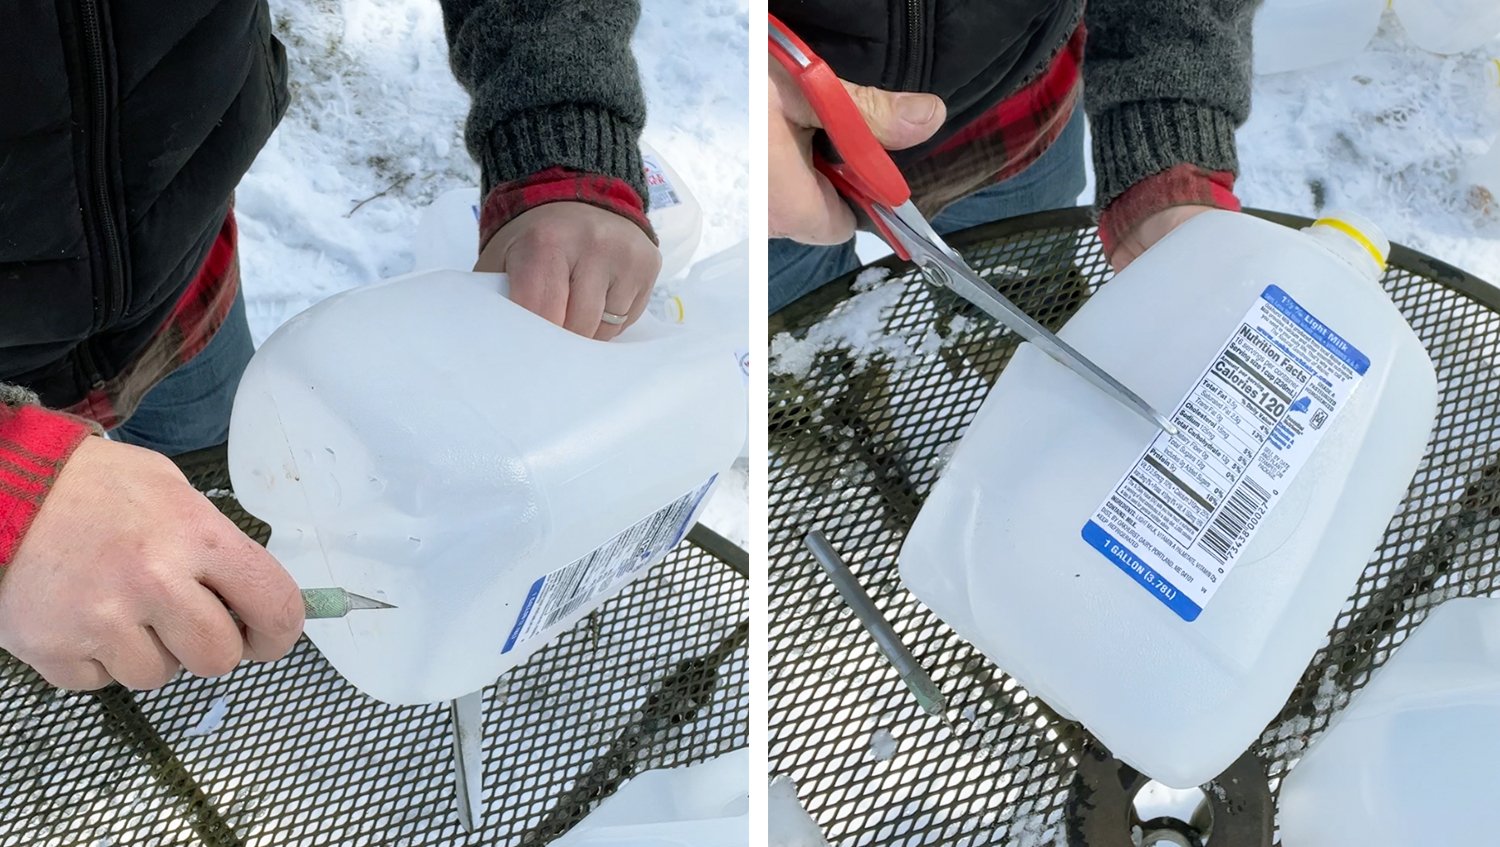
• Poke several drainage holes in the bottom of each jug.
• Starting around the base of the handle, begin to cut the jug horizontally across, stopping short to leave a 2-inch connected segment which will act as a flap.
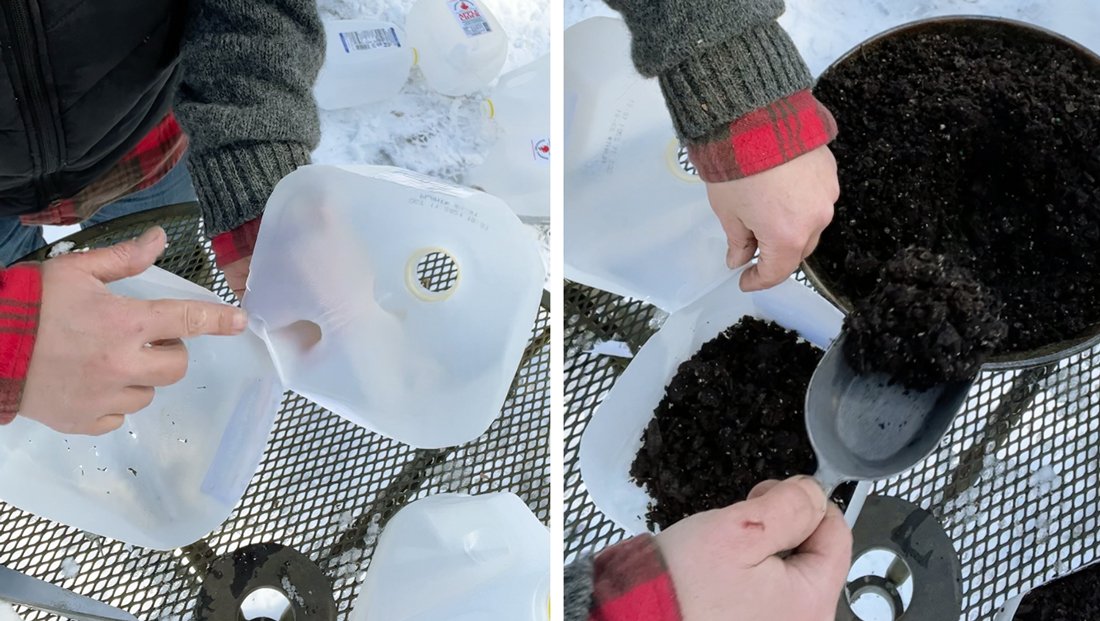
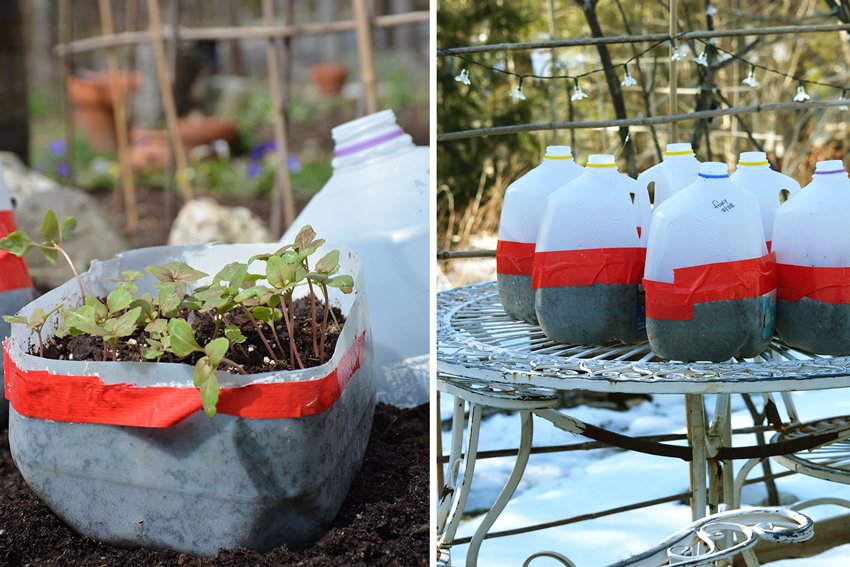
• Use potting soil to sow these seeds (seed starter soil does not offer the density and nutrients that the seeds will need to grow on from germination).
• Dampen the potting soil and fill the bottom half of the milk jug with the soil.
• Gently pat down and sow seeds to the depth and light according to the seed packet.
• Flip back the top half of the jug to close it over the bottom half.

• Using duct tape, seal the cut seam shut.
• Place jugs in a sunny location.
• Check on them every once in a while as they may need some water to prevent them from drying out.
• As soon as your soil is ready, remove the tape from the jugs and gently transplant your seedlings.

my favorite flowers to start sow via the milk jug method:
Bells of Ireland
Scabiosa
Larkspur
Poppies
Snapdragon
Clarkia
Cornflowers
Dara
Sweet Peas
Love in a Mist
Have you sown via this method? Have a favorite seed to start this way? Please drop a line as I’d love to hear! Happy sowing!